Showing posts with label gradation. Show all posts

Wednesday, June 29, 2011

New Sinful Colors Beverly Hills + BM mani!

I'm still on the hunt for the OPI PotC dupes Adventure Island (<--check out her post, she has some great comparison pics and a video!). Anyone found that in the Chicago suburbs area??

Anyways, I found the Beverly Hills display the other day at Walgreens.
Beverly Hills, Verbena, Savage, Why Not, and Pink Forever
Here's the ring from BH. So cute!

I loved how BH was a light lavender but then I got a little crazy with the sponging (Verbena and Savage). And it looked a little weird, so I added a new BM design in Konad White.

It looks very similar to my inspired Secret Wonderland mani:

I must love this color combo!

Oh, and here's my new favorite ring from loose threads on etsy:

So sparkley! And I got a great deal on this through Heartsy - Exclusive deals on fabulous handmade items at members-only prices.!

Thanks for looking!

Friday, May 27, 2011

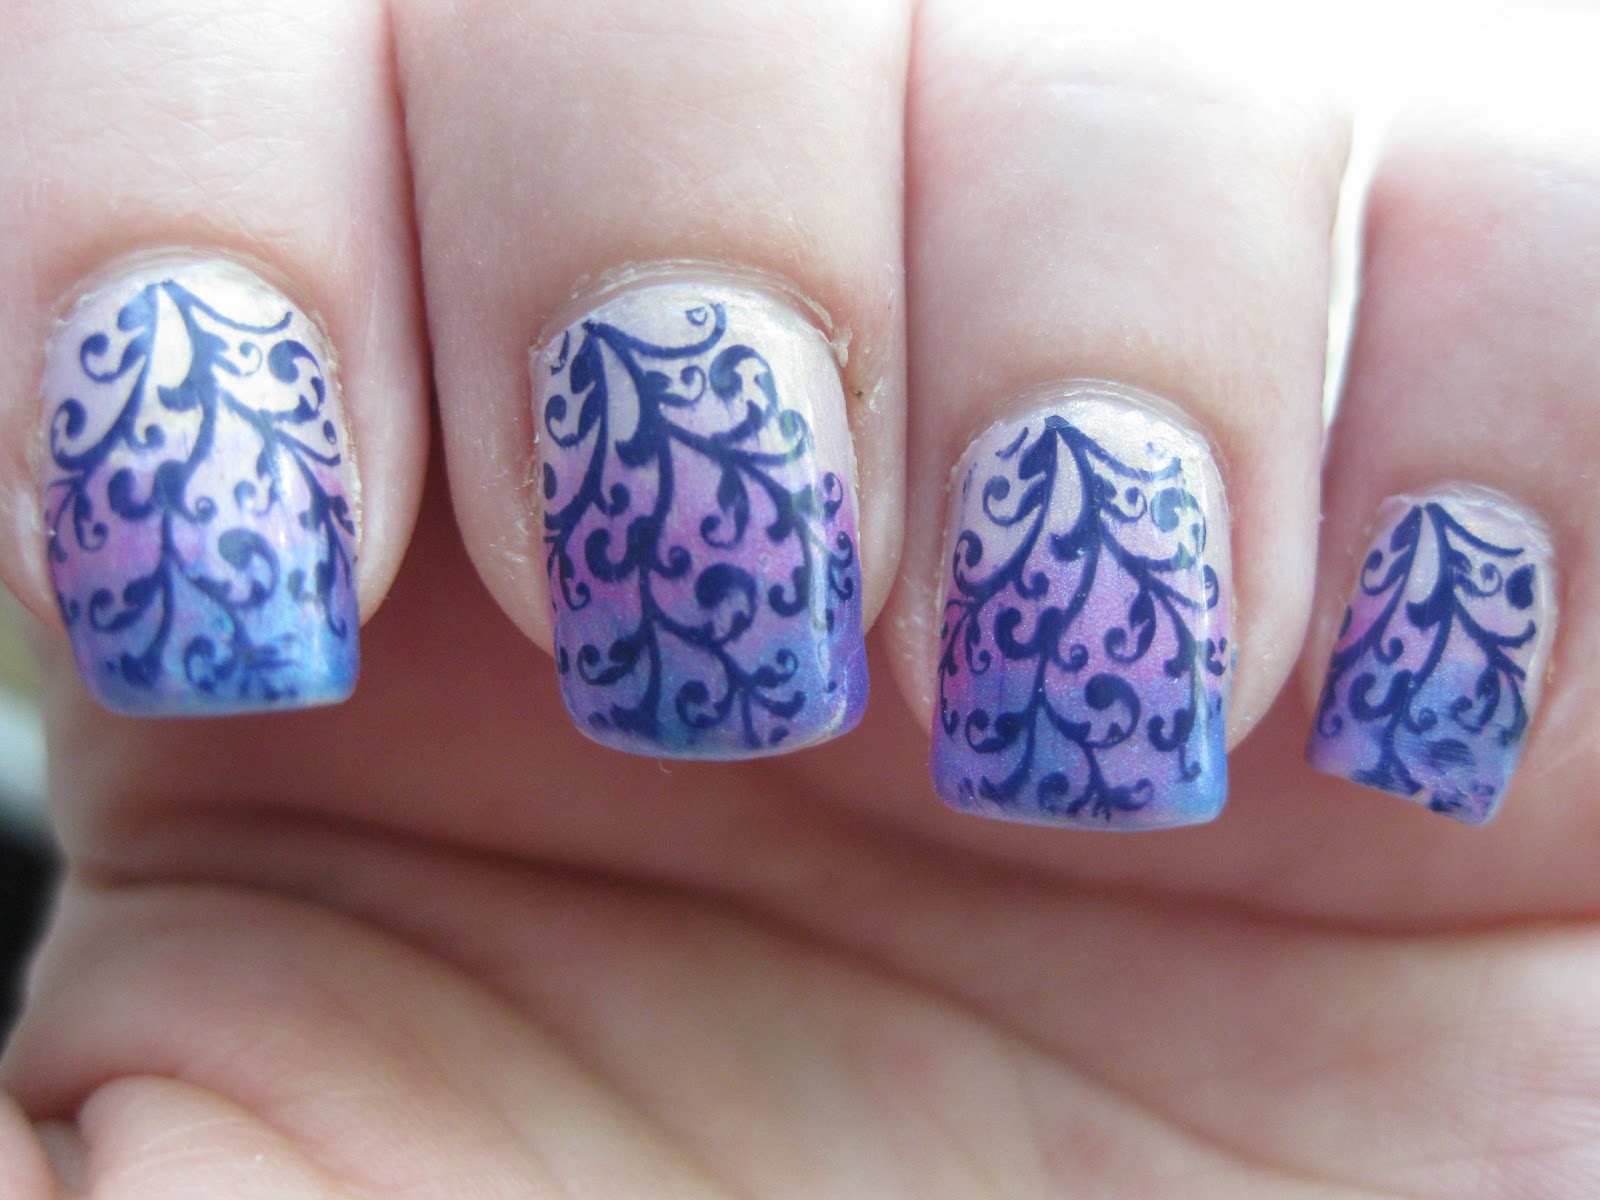
My Favorite Stamping so far (with a gradient!)

I bought the new Bundle Monster plates and I knew this was the first one I had to try.

I started with 2 coats of Misa Sun Kissed. Then sponged on Color Club Ultra Violet about 3/4 of the nail starting from the tip with an eyeshadow applicator. Then sponged CC Pure Energy on the tips with the other side of the applicator. I waited for all that to dry, then stamped with the image from BM-225 with Purple Konad.


I think it looks a lot like my new favorite scent's packaging, Secret Wonderland, from B&BW.

I LOVE THIS!!   I wore this for a week I loved it so much!

What do you think?

Thanks for looking!

Wednesday, August 18, 2010

Fun with Orly Royal Navy, SH Hidden Treasure, and ChG Glacier

I usually try to test out new looks or ideas at the end of the wear of my manis just in case they suck and I am too lazy to do a fresh mani over again. :)

I had a little fun at the end of the wear of Orly Royal Navy. I tried to do a gradient with SH Hidden Treasure and ChG Glacier on my ring finger.

I am not too good at glitter gradients and wasn't even sure a flakie could be a gradient, and I was right--> it didn't turn out too well.

I applied a bit of a brushfull of Treasure on the tips of my nails then slid it down towards the cuticle to try to get a gradient andit seemed to space out the flakies evenly! Then I used Glacier on my ring fingers in the same fashion and it collected more in the middle of the nail.

Am I doing something wrong trying to acheive a glitter gradient? Please let me know in the comments if I am being a total dumb@$$, kthanx.


Then I added ChG Matte Magic on one hand and I'm not sure which look I like more.
What do you think?

Tuesday, December 15, 2009

Win a Bottle of Gradation Liquid @ nevertoomuchglitter's weblog

nevertoomuchglitter is giving away a HTF bottle of gradation liquid!

This is a 48 hour contest! Click the pic above for more deets and to win!

Good Luck!

Wednesday, December 9, 2009

petites dare, a successful gradient?

I was at Wal-Mart a while back, since my Wal-Mart still does not have Hard Candy, I decided to curb my craving with petites dare that I found.


I thought this would be a great topcoat because of the flakes and since it looked like it would be sheer, but after I put on the first coat I realized that I could *probably* try to do a gradient with this. So I gave it a shot and here' how it turned out.


shade


direct sun

I am sooo pleased at how this turned out! It is the best gradient (i think) that I have done so far. It was so easy.
1) Start with one full coat.
2) Apply another coat to half of your nail.
3) Then two more coats along the smile line.
That's it! It is not that hard, but why did it take me so long, you ask. It is sooo hard to find the right kind of nail polish that you can build. This one also has some glitter and small flakies in it which hides the lines even more.
Now if I could just find this same formula in other colors! From what I remember I didn't see any more colors in petites that had this type of consistency and flakies. But I'll think I'll head back to my Wal-Mart soon!
Thanks for looking!

Friday, November 20, 2009

Gradation Liquid Attempt #1

A while back when happyberrynaiad was selling some of her nail polishes, I bought Gradation Nail Liquid.

She also included a cute note and some nail decals and a cute note.


Well, here is my first attempt using the gradation liquid. I used NYX Morocco for the tips and OPI Breathe Life on the rest of the nail.


I did about 2 coats on the tips since NYX Morocco is pretty sheer. I waited a couple minutes in between each coat before applying the next. Once I finished the last coat I applied a thin amount of the gradation liquid at the base of the tips of the polish (if that makes sense). Then I attempted to drag the polish away from the tip of my nails. I finished it off with a coat of BL over the whole nail.
It didn't seem to really 'pull' the polish all the way to the edge of the nail. You can't really tell in these pictures, but I know and that's why this is just an attempt and not a success.

Has anyone used this before? Do you have any suggestions for me?
Thanks for looking!

Wednesday, October 14, 2009

Avon Change Artist & Falling Stars

For some reason I really thought these would be awesome. I should have heeded Jen @ ABS's warning. But she was very right about these being opaque in one coat! But removal was like you are wearing straight glitter!


I got these from amazon.com (where they are no longer available) for about $2.99 each. I had a gift card so I didn't feel too bad that these weren't that great.


Packaging:


shimmering teal, shimmering steel, shimmering lavendar, shimmering red

Of course I couldn't just get one, I had to get EVERY COLOR THEY WERE AVAILABLE IN (because that's how nail polish addiction works, right?)


The measly, small, little brush they give you to work with for nail art/french nails/etc.

shimmering steel with some nail art

really really hard to see
shimmering teal w/ some nail art and bumps of polish
shimmering lavendar (my favorite of the bunch) with nail art
shimmering red with nail art

this one I really did gob on to get that bit of nail art
As you can see the coverage with one coat was great, but the nail art was hard to show up or even see! You had to gob it on (if that makes sense) with the small wand and hope that it would turn into something. Overall I don't really regret purchasing these just because they were so cheap (and I had a gift card) but I would regret these if I had paid full price.
Since I wore these nail polish for a day each, I decided to get a little creative. :)

In this POST I talked about how much I liked Nihrida's Shooting stars:


Then Glittermillie attempted this and it came out fantastic:

And now here are my sad attempts at this, but instead of shooting stars I call them falling stars since I am starting at the end of my nail working toward the cuticles.

!!BE WARNED!!

No toes...just many attempts :)

First I used:

Zoya Trixie, dumped some NYX silver glitter into Orly


This is the outcome of using Orly and NYX glitter on half of my nail then Trixie on the tips on top of shimmering steel. Not soo good.

a bit too globby

My second attempt: WnW Kaleidoscope, Zoya Trixie, ChG Nova, Eyeko Disco Polish

I used Kaleidoscope for half of the nails, followed with Nova on half of the nails, then Disco Nails on 3/4 of the nails, then Trixie on the tips over shimmering teal.

A bit too much bling and globby.

For my third attempt:

WnW Kaleidoscope and ChG Nova

Nova on half of the nail and Kaleidoscope on 3/4 of the nail over shimmering lavendar

Not a lot of bling, but kinda texturized and not even.


My fourth and final attempt:

Kaleidoscope on half of the nails and Sinful Colors Queen of Beauty (like Glittermillie used above) on tips of the nails over shimmering red.

I really liked how this one turned out and I wore it for about 2 days after apply all this. The silver started to rub off and turn kinda pink, but it still looked awesome.
Thanks for looking!